Thursday 29 January 2015

Sweet Wrapper Textiles

Where do these weeks go?  I can't believe it's time for Planet Penny's Happy Friday again already!

We had our first Sunday roast for a while this week and whilst doing the potatoes this made me and my hubby smile.  We couldn't possibly roast this one!  Maybe we should save it until St Valentine's Day?


I had a really enjoyable day today.  A group of friends got together at our house for a 'textile' day. There were 9 of us in all making 'fabric' out of sweet wrappers, felt or velvet and sheer fabrics.  One big mistake I made was not taking any photos throughout the day!! Doh!  We were so engrossed in what we were doing, it completely slipped my mind! So I'm afraid I only managed to take some photos of my finished project to show you.


I was really pleased with the way these turned out - a case for my glasses and a needle case which I have been meaning to make for ages - and the fact I managed to finish them both.  I just love the bright colours.

Looking forward to seeing what made you happy this week :)

Sunday 25 January 2015

Remembering Taffy's visit to the Dentist

It's a pleasure to be linking up to Handmade Monday again this week at it's new home with Lucy Blossom Crafts.  Wendy from Handmade Harbour has done a fantastic job of hosting 200 Handmade Mondays and I wish her well with her choice to concentrate on her illustrations. I would also like to thank Vicky of Lucy Blossom Crafts for taking over this very friendly and welcoming link party and am sure it will continue to be a great success.

This week we had a visit to the dentist :( Only a check up, but never my favourite place to go!  I remembered some time ago on a previous visit we took Taffy with us for his first check up.  Who is Taffy I hear you ask?  Now, followers of my blog from the beginning will know the answer to this, but for those of you who wonder what on earth I'm talking about, take a peek at this post and all will be revealed.

Have you had any 'interesting' trips to the dentist recently? 
Here's how Taffy got on.

Poor Taffy!  
This was his first ever visit and he was a little anxious to say the least!  But, do not despair, everything went well!
This is our fantastic dentist, we have known him for many years now (longer than I care to calculate!) so I knew Taffy would be in good hands. He soon put Taffy at ease. Can you see how relaxed Taffy looks?
 Open wide Taffy!
"Everything looks fine" said the dentist.  "See you again in 6 months"
"Phew" said Taffy!
Taffy is looking very pleased with himself now!  The dentist gave him a sticker for being such a good teddy!
I think this may have been a first for the dentist, as well as Taffy!
What do you think?

Hope you have enjoyed reading about Taffy.  
He has got up to all sorts of mischief on his adventures.  
If you would like to see any of the others 
type 'Taffy' into the search box which is just below the picture of me 
on the left hand side of my blog, 
and take your pick!

Looking forward to catching up with you all and meeting any new bloggers, over at Handmade Monday, see you soon :)

Thursday 22 January 2015

Patchwork Placemat on Happy Friday

I have been following Planet Penny now for quite a while and just love the wonderful colours she uses in her patterns, so much so, that I had to buy a pack of Planet Penny Cotton.  I'll show you a few of the items I used it for a bit later.

So when I realised she was setting up Happy Friday, I was delighted to take part.  I couldn't think of what I would include to start with but reading a few of the other bloggers posts I soon realised I was looking for something far too complicated and hadn't noticed the simple things around me.

I noticed from our lounge window this morning how beautiful the sky was.


This made me feel happy!

I have recently joined a patchwork and quilting group and have set myself the task of completing 6 placemats, each one a different design but using the same colours.  We meet on a Friday so this week's is (thankfully!) completed ready to start another.


I did not enjoy making this one, it was so difficult to keep everything lined up and wrinkle free so it made me extremely happy 
when I finally finished it and it didn't look quite as bad as I thought it would!!

I'll leave you now with pictures of a few of the items I made with Planet Penny Cotton.


A Giraffe for my daughter (who's 24 I might add!!)

x

Sunday 18 January 2015

Quilted Jewellery Roll "How To" Part 2

I'm so glad you all liked the jewellery rolls.  They are one of those items you wouldn't think you need but once you've had one, taking jewellery with you when travelling becomes so much easier and I am definitely tempted to take more than I need now. Just in case you understand!!

I very much enjoyed reading all your comments on Quilted Jewellery Roll "How To" Part 1 and if any of you do have a go I would love to see your pictures.  If you find anything doesn't make sense please feel free to contact me and I'll see if I can help - but I'm no expert by any means!

Ok lets continue now with
Jewellery Roll "How To" 
Part 2

You have completed your 'fabric' for the front of your jewellery roll and now you will need to quilt it. Place the fabric on a piece of wadding just a little larger than the fabric.  The definition of quilting is: the sewing of two or more layers of fabric together to make a thicker padded material and that's exactly what you will do next.  I chose to 'stitch in the ditch' - sew in the seams really - along the edges of the larger squares.  I used a pale grey thread so it didn't show up too much.  You could sew around the little squares if you feel so inclined depending on the look you prefer.

Now we are ready to construct the inside.  I chose two zipped pockets, loops for necklaces or bracelets and a small pocket for bits and pieces in the centre.


To make the pockets I measured the jewellery roll and decided exactly where I wanted the zips to go.  I then cut 3 pieces of material, one large for the centre and two smaller ones for the outside allowing 1/2" for my seams. I placed the zips in the seams and pinned a small pocket in the centre.  I then hand stitched the pocket in place, just to make it look a little more decorative (see yellow arrow on picture below).  When this is completed cut another piece of fabric to the same size and place it right side up below the piece with the zips in.  Stitch from edge to edge, parallel to the zips,
in the correct place to create the size of pockets you require (see the black arrows below - you can just pick out the stitching).


Nearly there! Place the pockets you have just made and the 'fabric' with the hearts on, wrong sides together.  I found this next bit rather tricky!  Square everything up and trim to the correct size.  As the old saying goes measure twice, cut once!  If adding loops, pin these in place now.  Picture below shows them with the binding in place but you get the idea.  At this stage don't forget to add ribbons for tying roll together.


Finally, cut a strip of fabric 2" wide, long enough to go around all 4 edges of your jewellery roll. You can join this if you need to.  Fold in half and place raw edges together on the right side, stitch 1/4" from the raw edge. Turn smooth edge over to the inside and hand sew in place.  You can see both front and back of the binding in the picture below.


Now sit back and admire your work :)


Please forgive me, I haven't gone into great detail explaining how to 'Stitch in the Ditch' and binding your work as there are numerous videos on Youtube showing you how.

I hope this may have given you the inspiration to have a go.  This was only my third patchwork project so you can see you don't need a lot of knowledge to achieve.

I'll leave you now with a couple of pictures of my first two projects.

First project - Tulip cushion

Blocks from my second project which I made into a bag


Happy sewing!
See you all over on Handmade Monday

Wednesday 7 January 2015

Quilted Jewellery Roll "How To" Part 1

Well "Hello" everyone.  It is lovely to have Handmade Monday back and I do hope you all enjoyed and have recovered from the Christmas festivities.

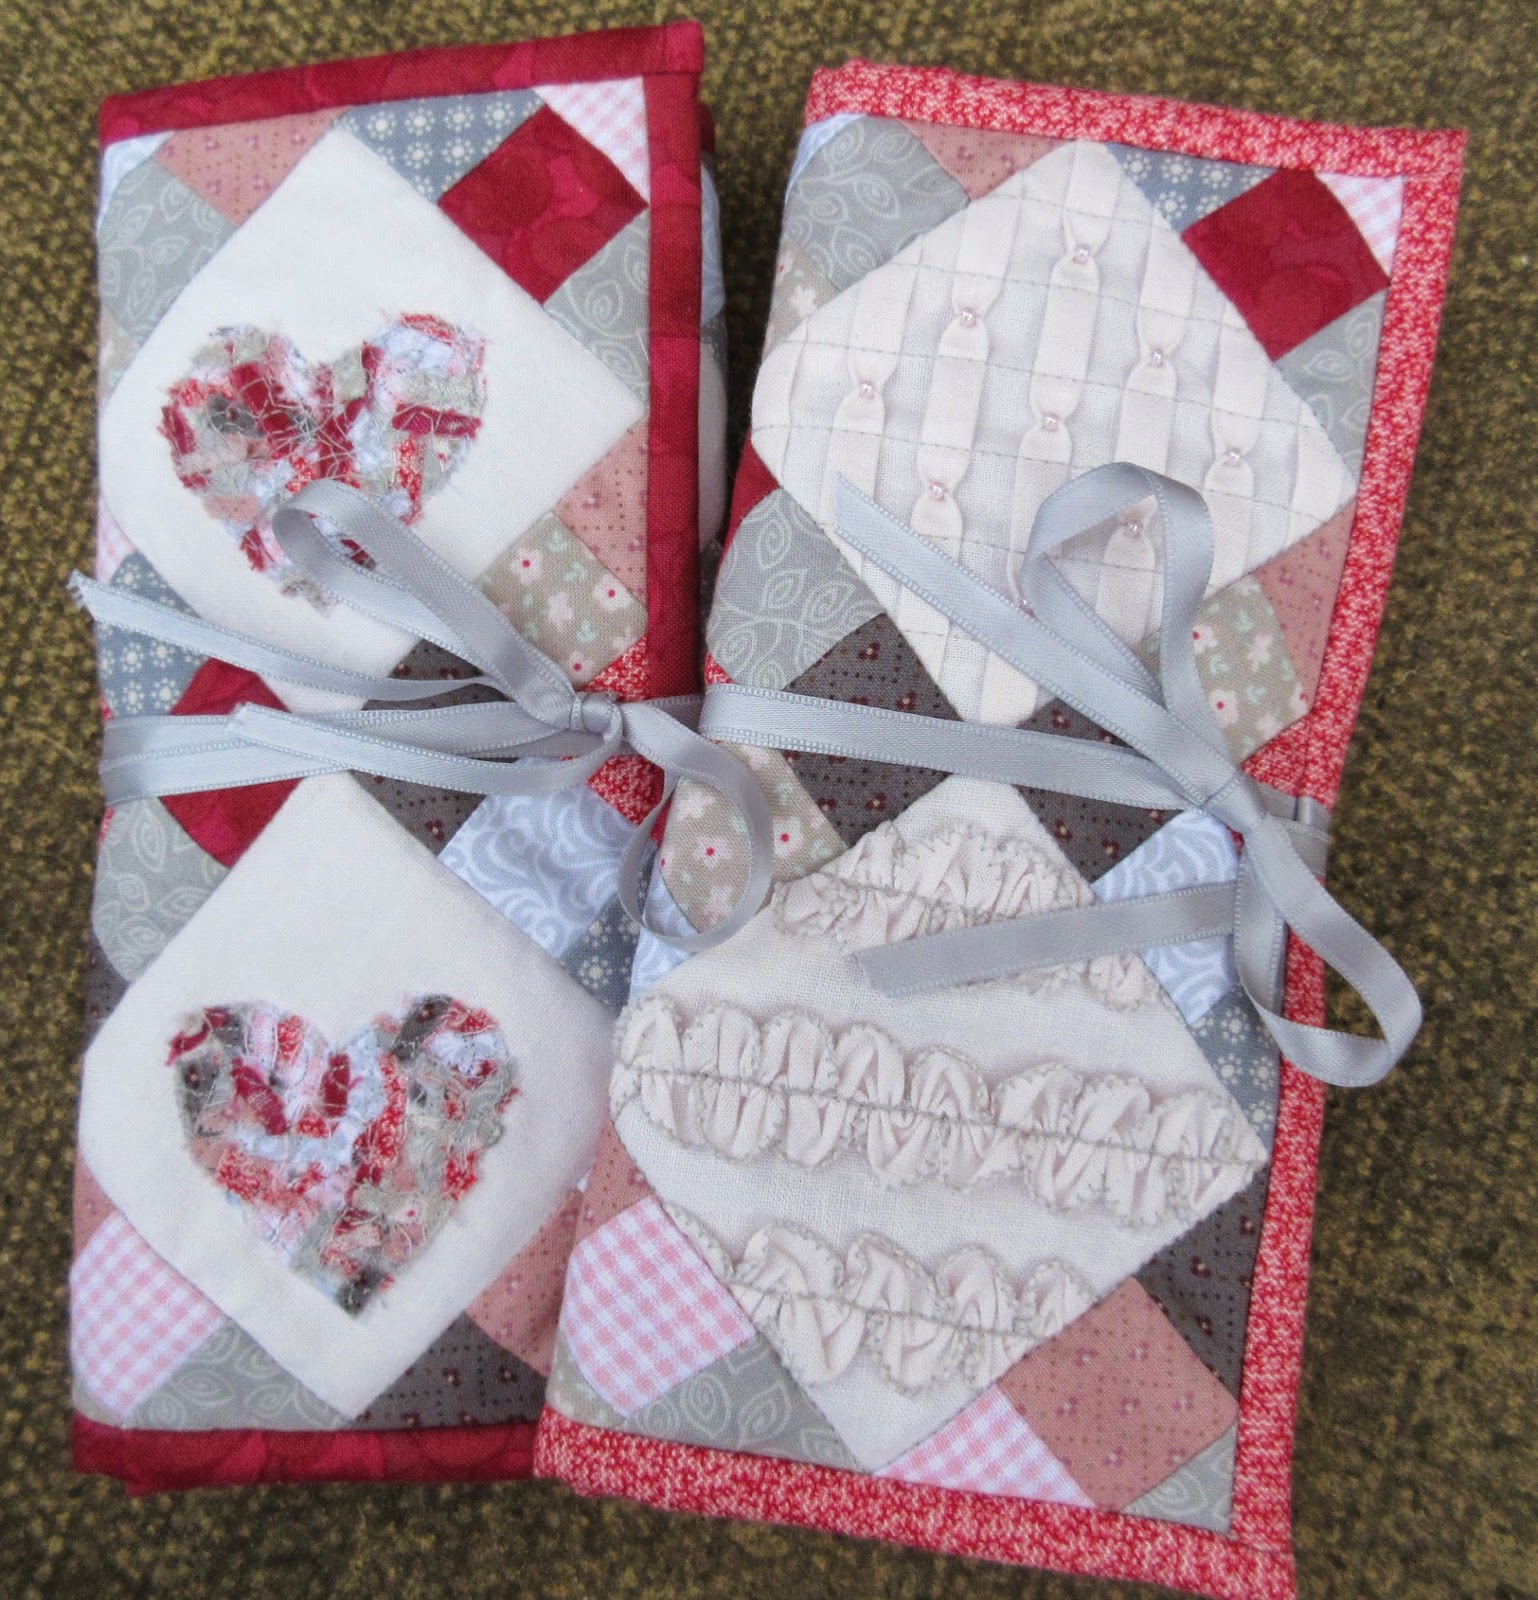
Here as promised is my "How To" for the quilted jewellery rolls I made my daughters for Christmas. If you haven't read my previous post it may help to give it a quick view so you know what all this is about.  You'll be glad to know my cold has cleared up and 2015 is back on schedule!

Jewellery Roll "How To"
Part 1


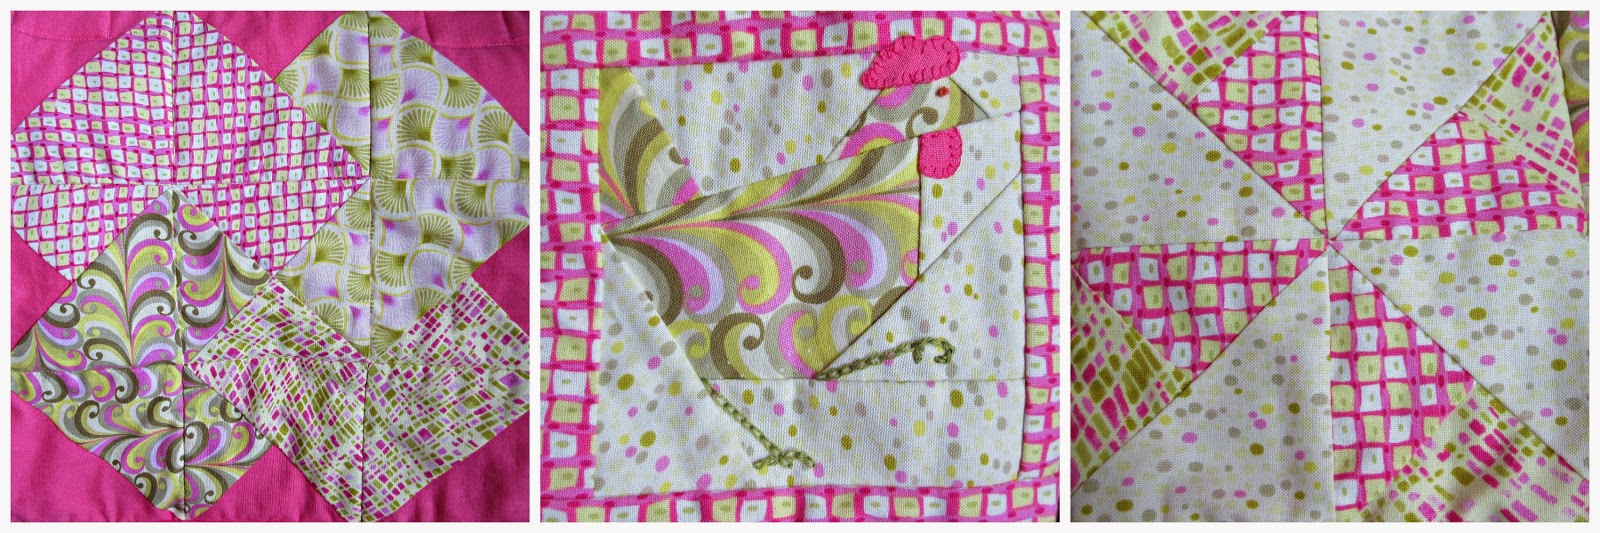
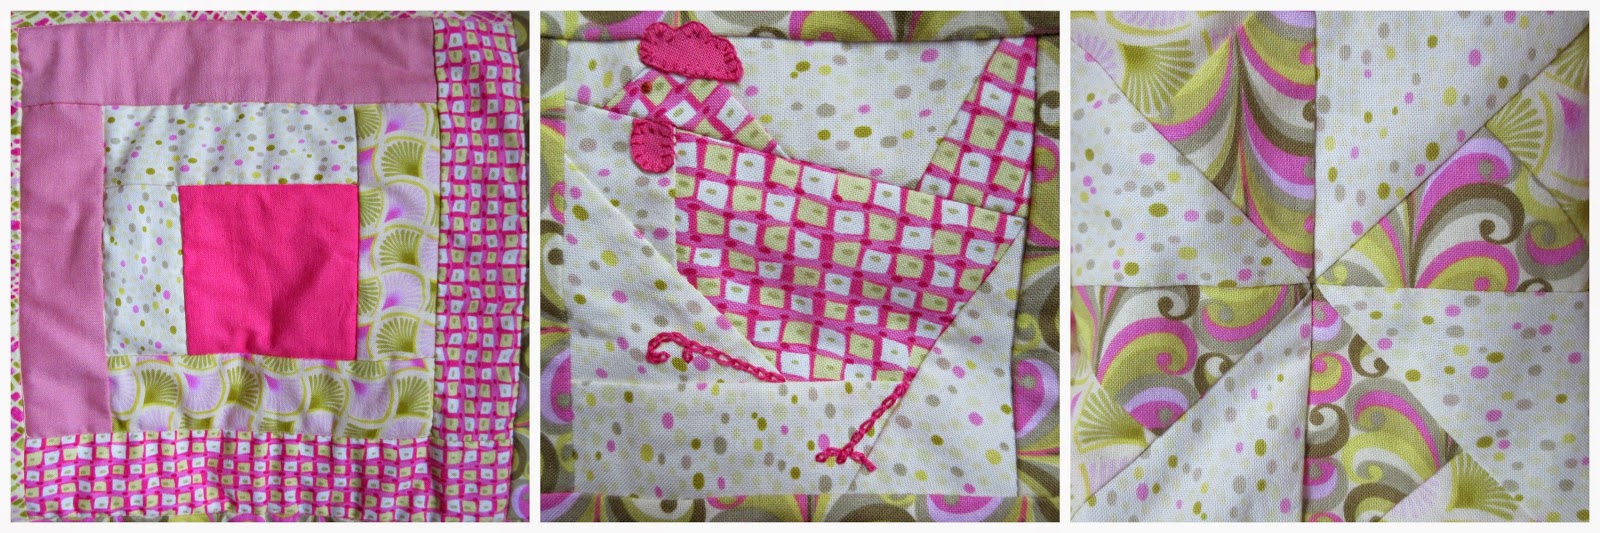
Below is what your finished 'fabric' will look like.  
You will have
2 full 9 square patches in the centre 
6 triangles made of 6 squares around the edges
4 corner triangles made of 4 squares in each corner.  
In total you will need about 74 of the tiny squares (perhaps a few extra in case you make a mistake!). You will also need 6 plain pale squares for the hearts.  
The finished size is about 11" or 12" x 7" or 8" depending on how accurate you are!  
When working with tiny squares like these there is plenty of opportunity for error, believe me!


Cut into 1.5" strips and then cut those strips into 1.5" squares.  I can't remember how many I cut but if you aim on about 9 x 1.5" squares of each colour you can use any left over to chop up for the hearts.


Now to start sewing!  Use 1/4" seams throughout.  Begin with the 9 square, squares and stitch 3 squares together to make 1 strip. Make the other two 3 square strips.  Then stitch the 3, 3 square strips together, side by side, matching up the seams carefully!  Press, then you have completed your first patchwork square!  Only another XX to go!  Complete the others in the same way and then you will be ready for the next stage.

At this point you will need to cut 6 plain pale 3.5" squares.  Lay all your squares and triangles out like this.


Now join into strips like you did before (see the arrows) the squares will just be slightly larger this time. Then join the strips together, side by side, being particularly careful to match up all the seams. Don't forget to add the last 2 corner triangles!  Press neatly, admire your work .... and breathe :)

You should have something which resembles this.  Each tiny square will measure 1" or just under (told you it was difficult to be accurate!) and each plain square will be 3" or under.


Ok - you still with me?

Good, let's make the hearts :)

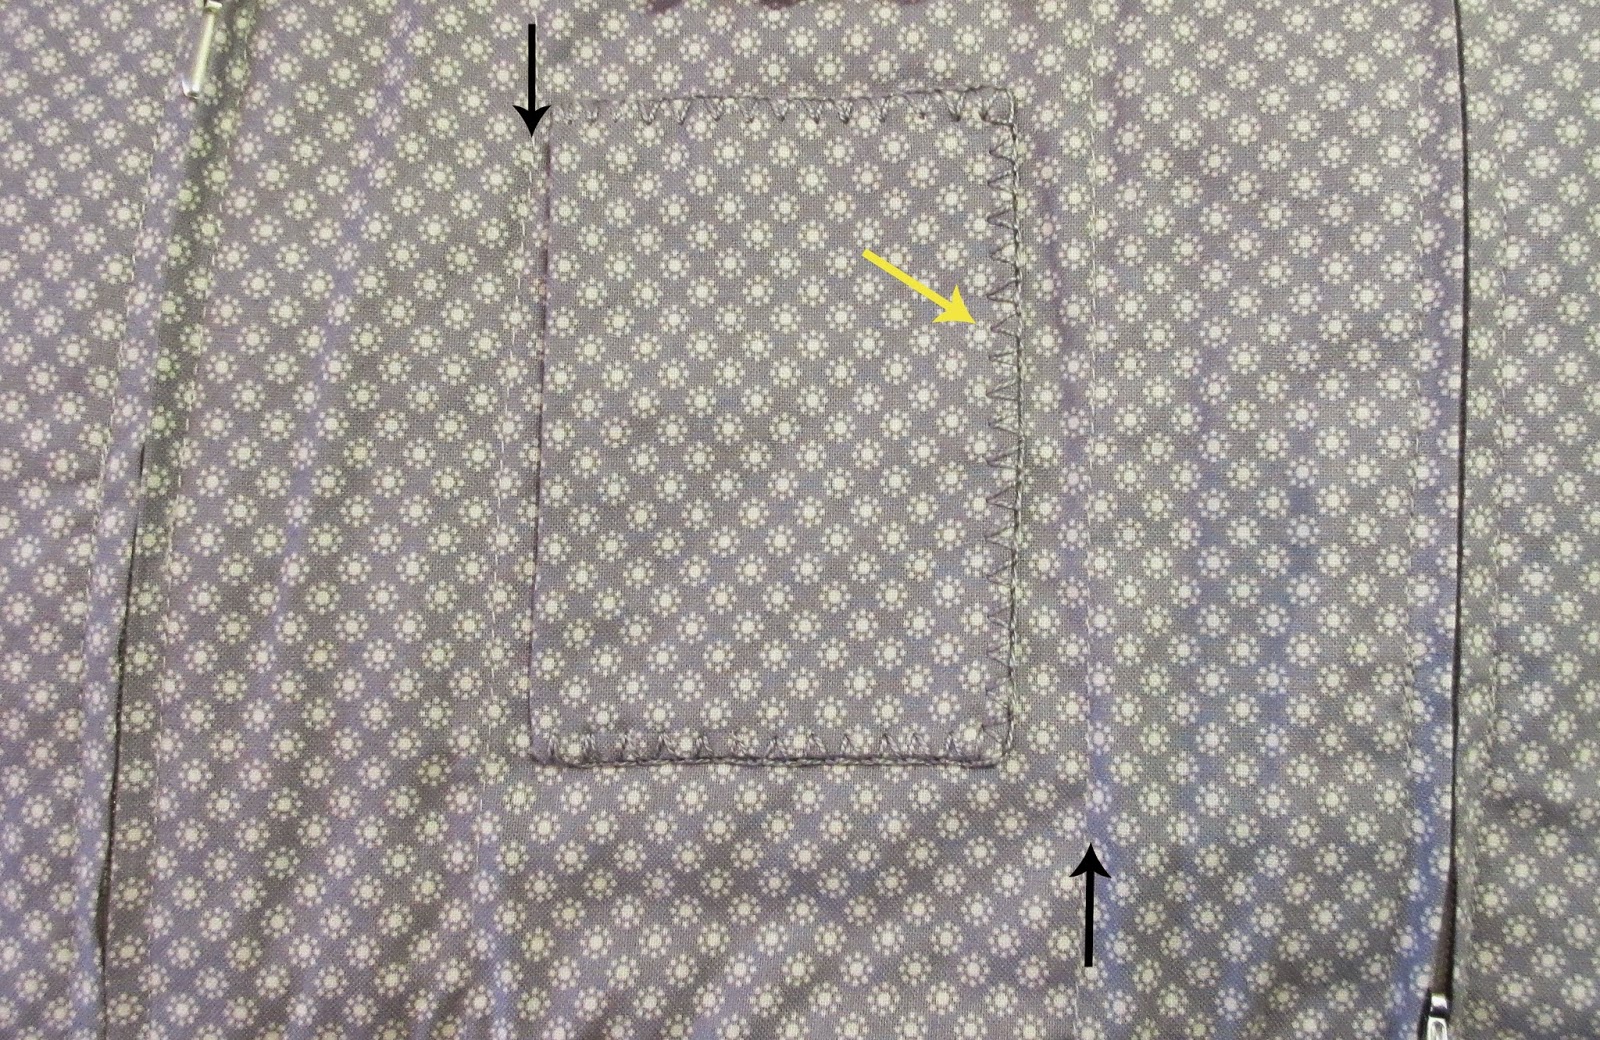
I'm afraid I lack a few pictures of this bit!  But it should be a doddle for you clever crafters out there. First you will need to draw a heart to fit the blank squares.  When you are happy with the shape draw this onto bondaweb (other gluey stuff does exist!).  Cut out and place in the centre of the blank square, ironing into place (don't forget to protect your iron from the sticky stuff).


At this stage it may help to stitch around the outline of the heart as it can be a bit difficult to see.  I also backed it with a little stitch and tear to give it a bit of strength.  Next you will need a selection of teeny weeny chopped up bits from all 9 choices of fabric.  Sprinkle these so they completely cover the heart and over the edges (now you can see why it's difficult to see). Protecting your iron again, iron over the itty bitty bits until they are stuck in place.  Now stitch around the outline of the heart and free machine all over until they are well and truly fixed in place.  You can do this as much or as little as you wish. Finally trim off any excess little pieces. Give yourself a pat on the back and ..... complete the other 5!!

I
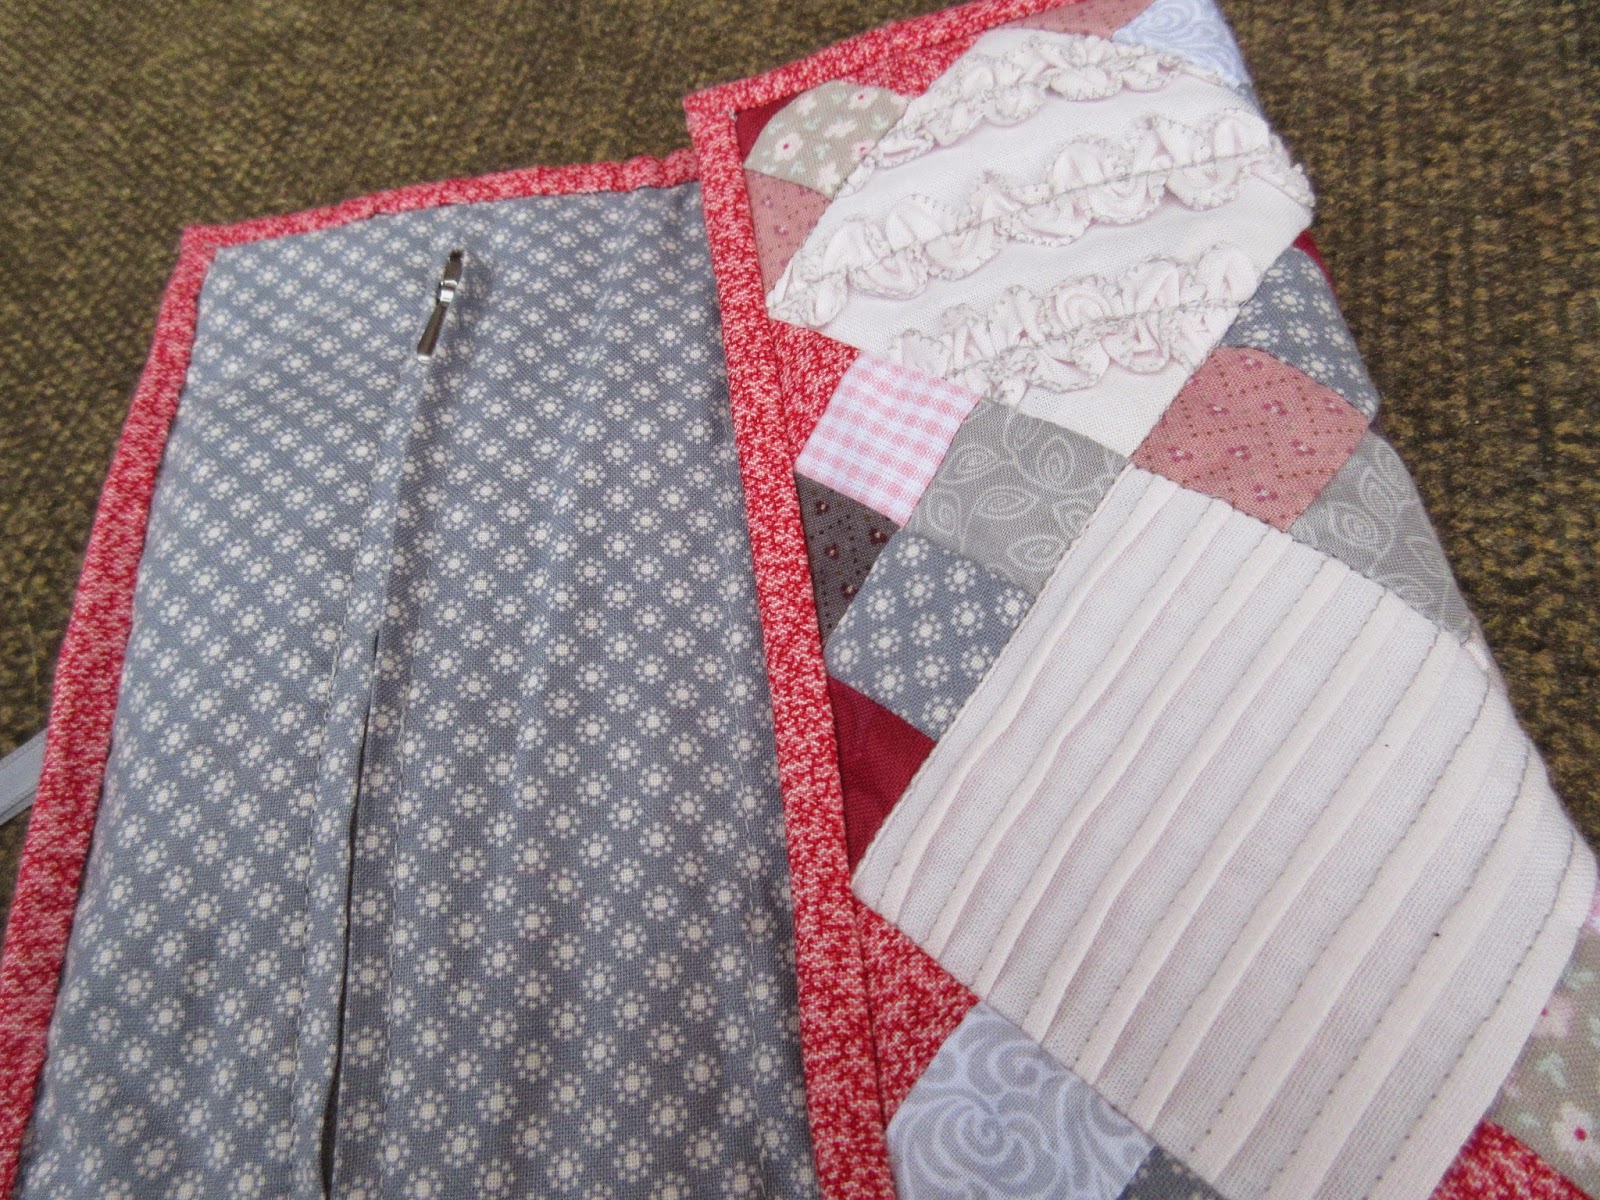
Phew!  I think that is enough to take in for one session, it will take quite a while to get this far so next week I will post Part 2 which will explain the quilting bit and how to make the pockets for the inside.

Happy sewing!


Monday 5 January 2015

Hello 2015! Hello Jewellery Rolls!

Well I personally have decided to postpone the start of 2015 for a week or two!!!!  Why?
Well on New Year's Day I came down with a pretty rotten cold!!! First one for at least a year and a half, so not bad really but not how I would have planned the start of 2015 if I had had a choice! But to those of you who are off to a roaring start may I just wish you a very Happy and Healthy New Year!
Having said that whilst I'm snuggled up on the settee with my box of tissues, watching day time TV, I am thinking of using my time wisely. Those of you who have kept up with my blog may remember many moons ago I mentioned joining a Quilting Group.  You may also have noticed I haven't mentioned it since!! I had a very legitimate reason though.  I decided to make a couple of Christmas presents for my daughters and as Clare who writes her own blog reads mine and with the remote possibility of Kerry popping in to see what I've been up to, of course, I had to keep schtum!

But now it's time for the great reveal!!


I didn't want to make a full size quilt or a lap quilt but was interested to learn the art of quilting so I made two jewellery rolls with very tiny squares.  Each of the little coloured squares are less than an inch.  I did Kerry's first (the top one with hearts) and then challenged myself a little further with Clare's using fabric manipulation (the bottom one). There are two zipped pockets, a small pocket and loops for necklaces on the inside.

If anyone is interested, I am going to start on a 'How To' in the next few days, so please pop back and I will explain how it all came together.